Your First Dynamic Effect
Basic DNA Setup Video
1. Prerequisites: A Niagara Effect with User Parameters
To use your VFX with DNA (Dynamic Niagara for Animation), you need a VFX that uses Niagara. This effect should have some user parameters that you can change/tweak to create variations.
There are a few effects available with the demo project; we will use NS_VFX_01_Slash_Variant_Red1_Smoke_Demo here.
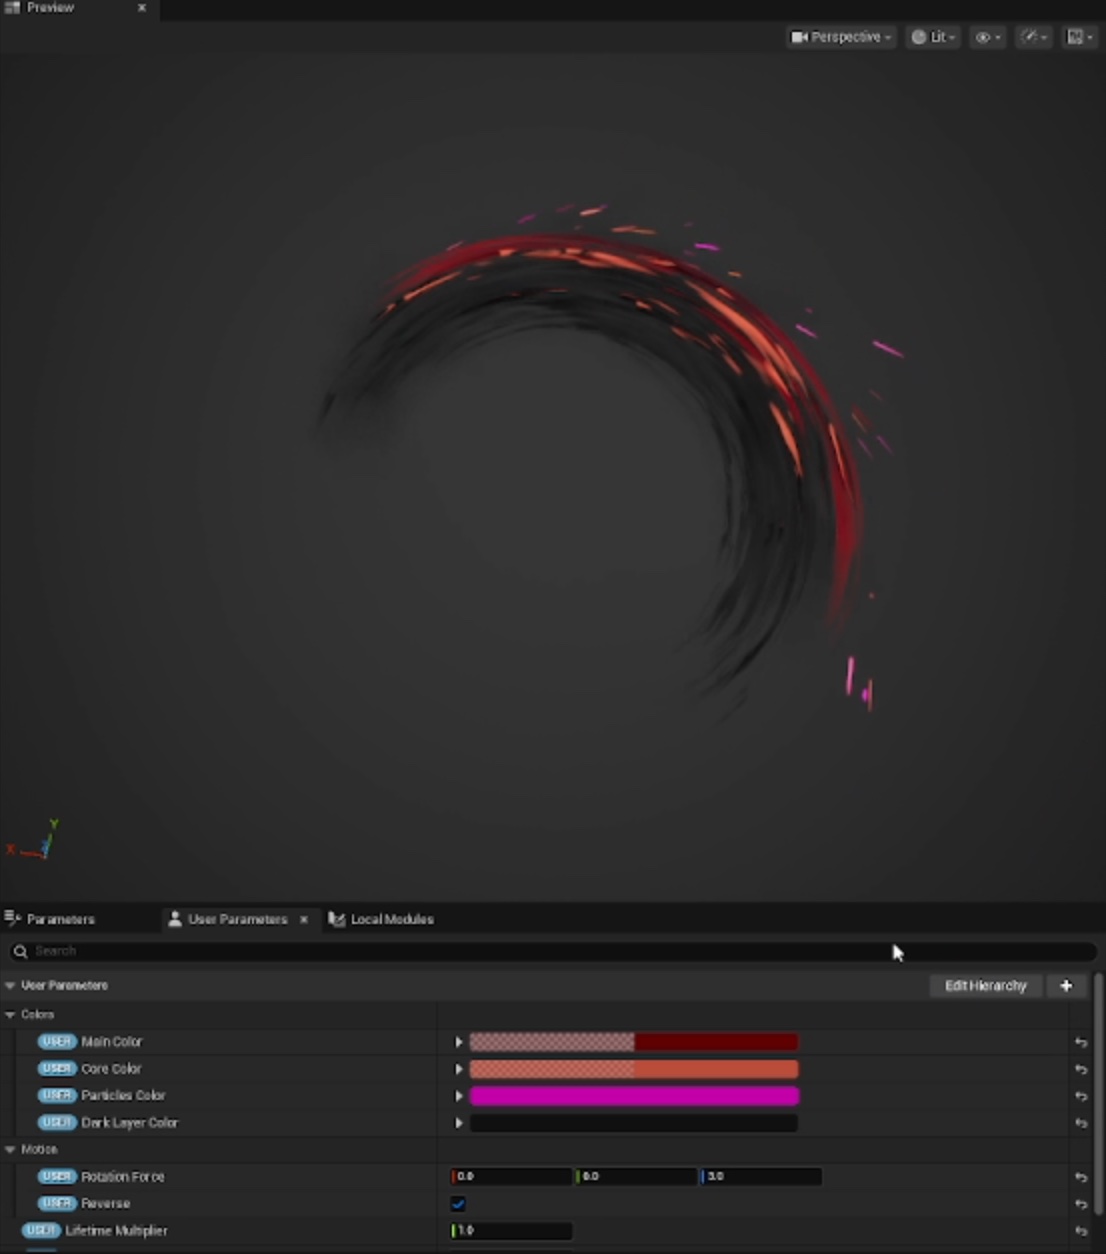
This effect has several user parameters, the most interesting are:
- Reverse [boolean]: Changes the direction of the slash effect
- Core Color [Linear Color]: The color of one part of the slash
- Main Color [Linear Color]: The color of another part of the slash
- Dark Layer Color [Linear Color]: The color of the background layer
- Particle Color [Linear Color]: The color of the particles
- Sprite Scale [float]: The scale of all the sprite elements since they are not affected by the Niagara system scale
2. Open an Animation Sequence or an Animation Montage
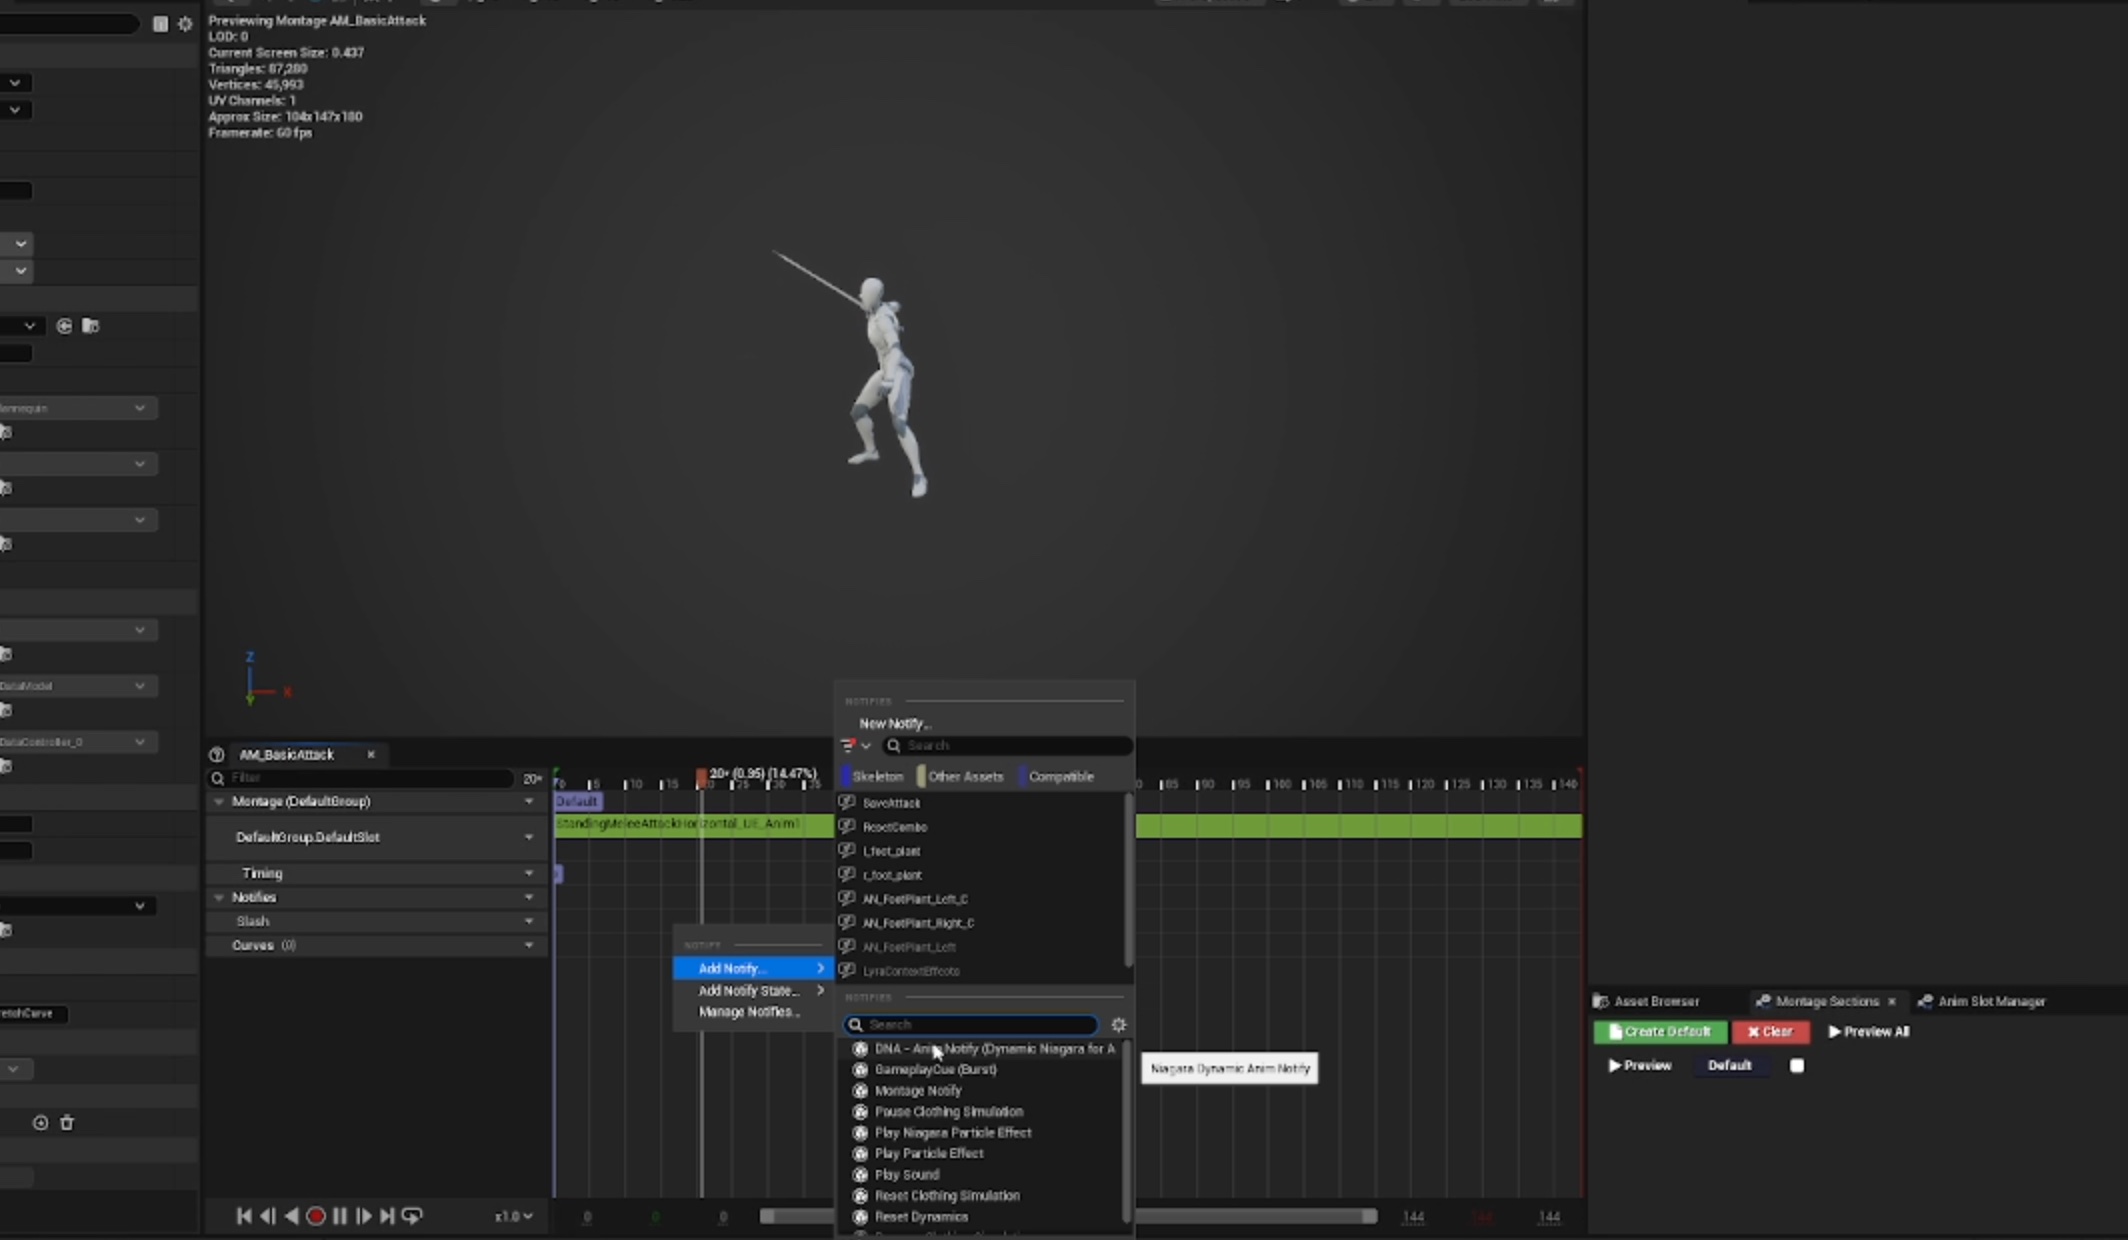
3. Add the DNA Anim Notify
In the Notify track, right-click and select "Add Notify...", then search for "DNA - Anim Notify (Dynamic Niagara for Animation)".
4. Configure Your Niagara System
In the Details panel, open the "Direct Configuration" dropdown, and select your Niagara System.
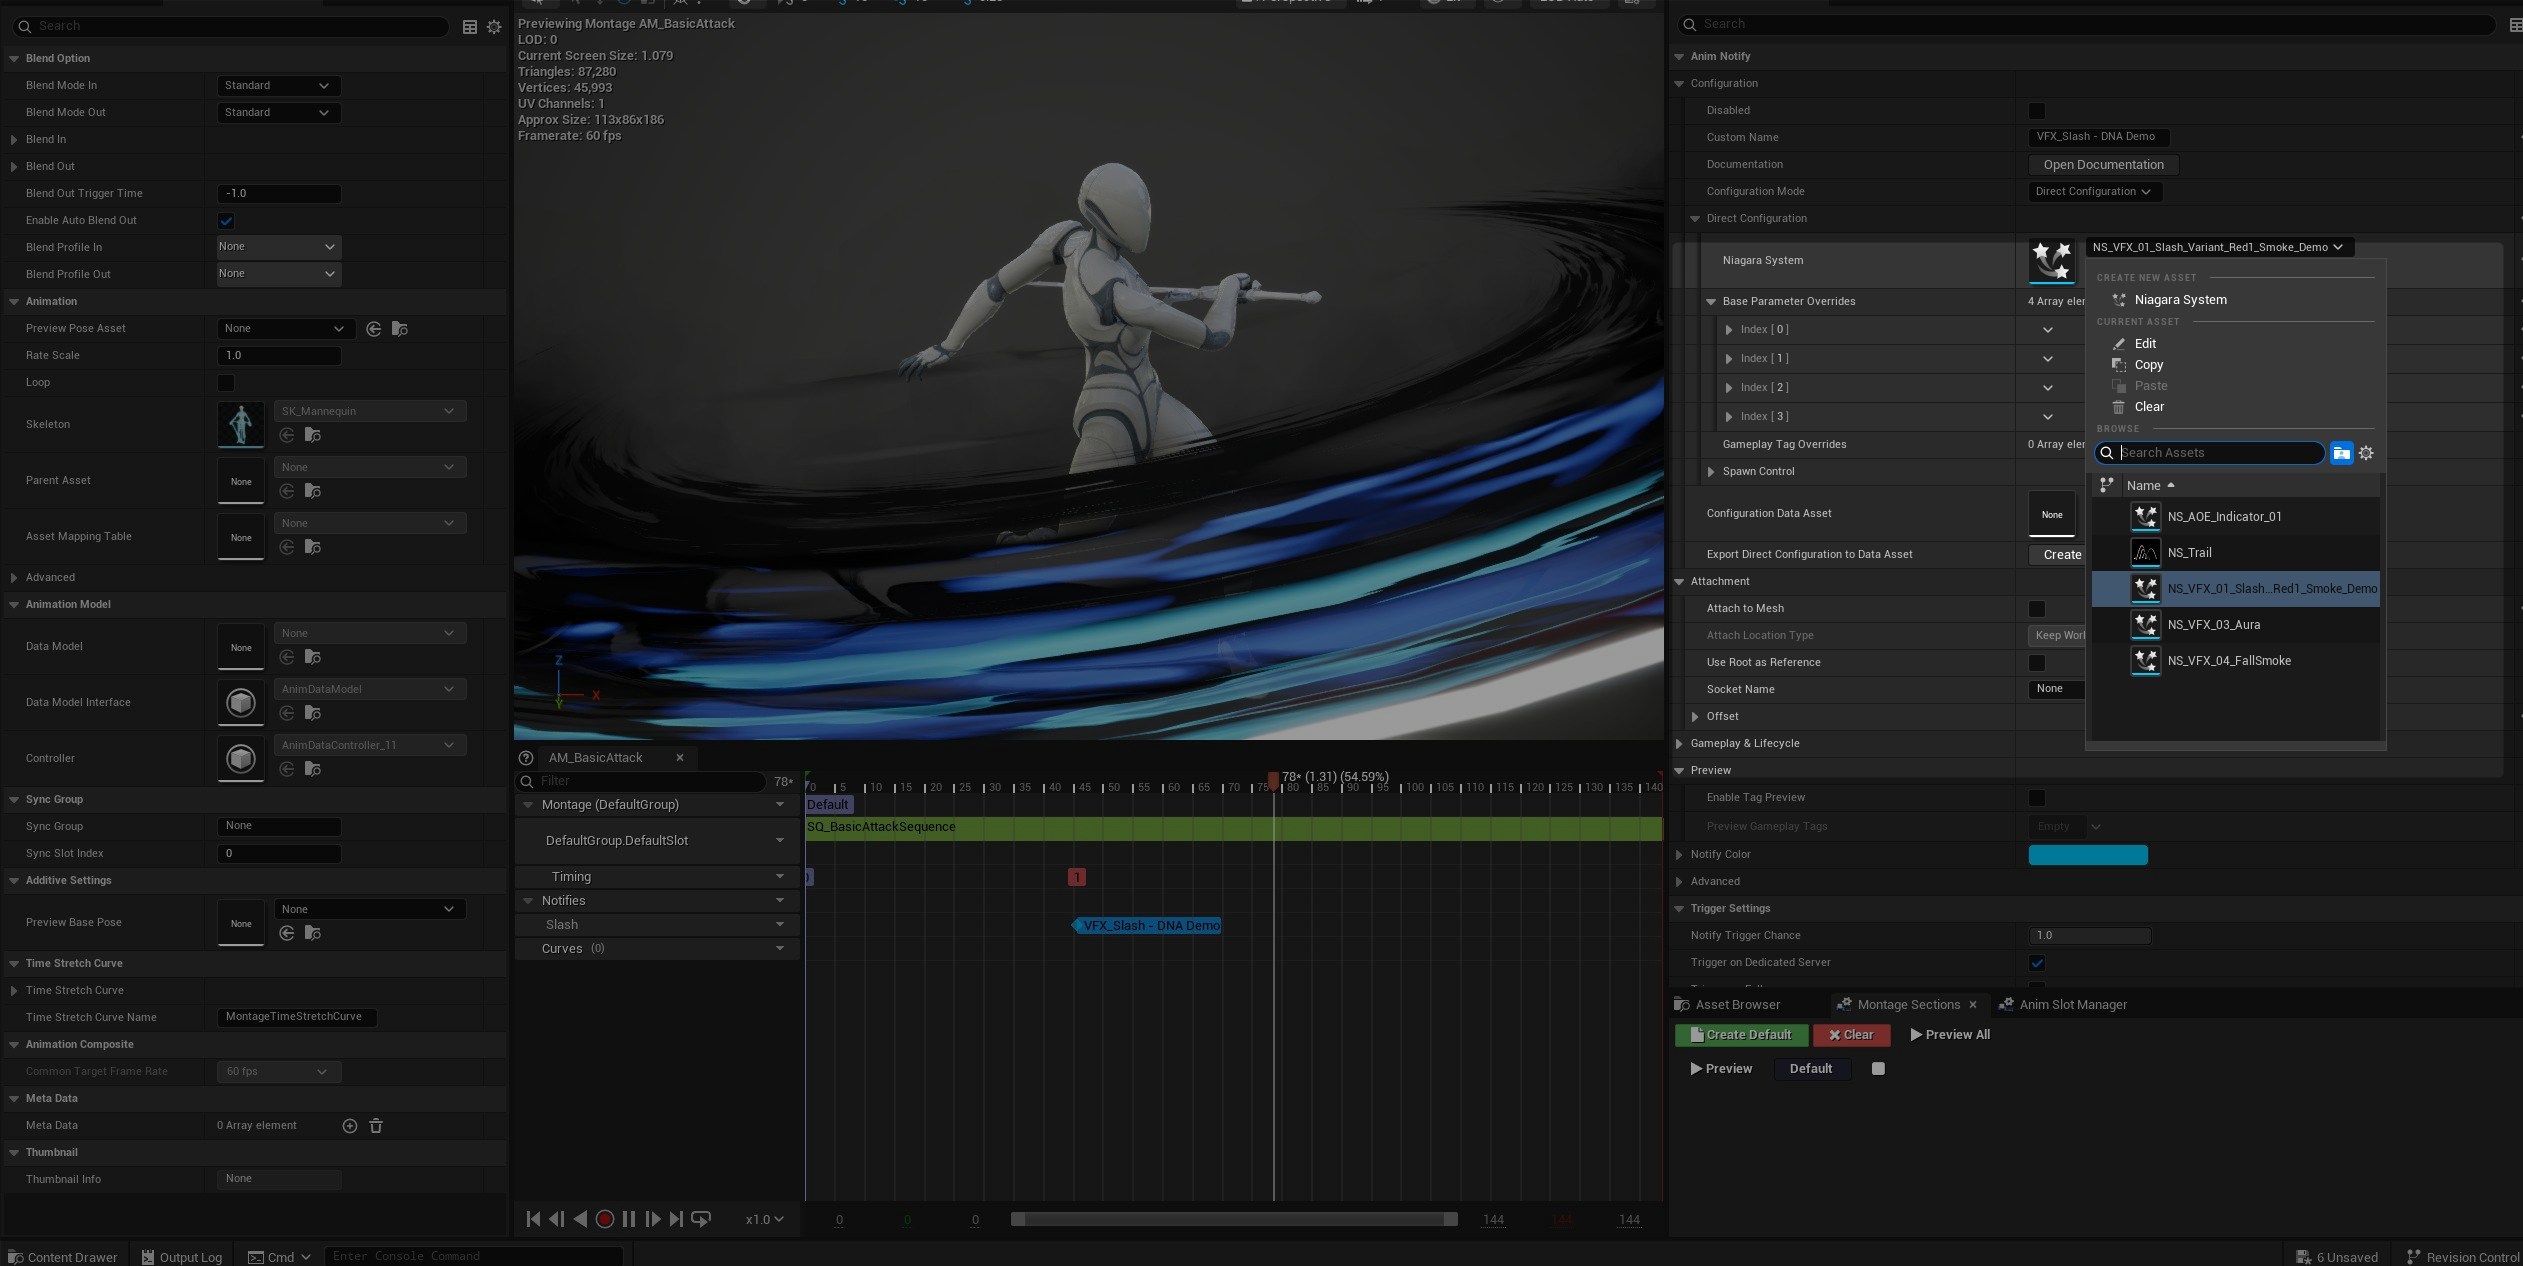
It should be like this by default, but ensure your configuration mode (in Configuration > Configuration Mode) is set to "Direct Configuration".
Note: To learn more about different configuration modes, please follow this link: Configuration Mode
Once you've added the Niagara System, you should see it in the preview.
5. Adjust the Attachment
Depending on the type of effect you're creating, you might want to attach the effect to the mesh so it follows the character. You can also attach the effect to a Socket for more precise placement, or the opposite: spawn the effect at a specific location relative to the mesh, but not attach to it after spawn.
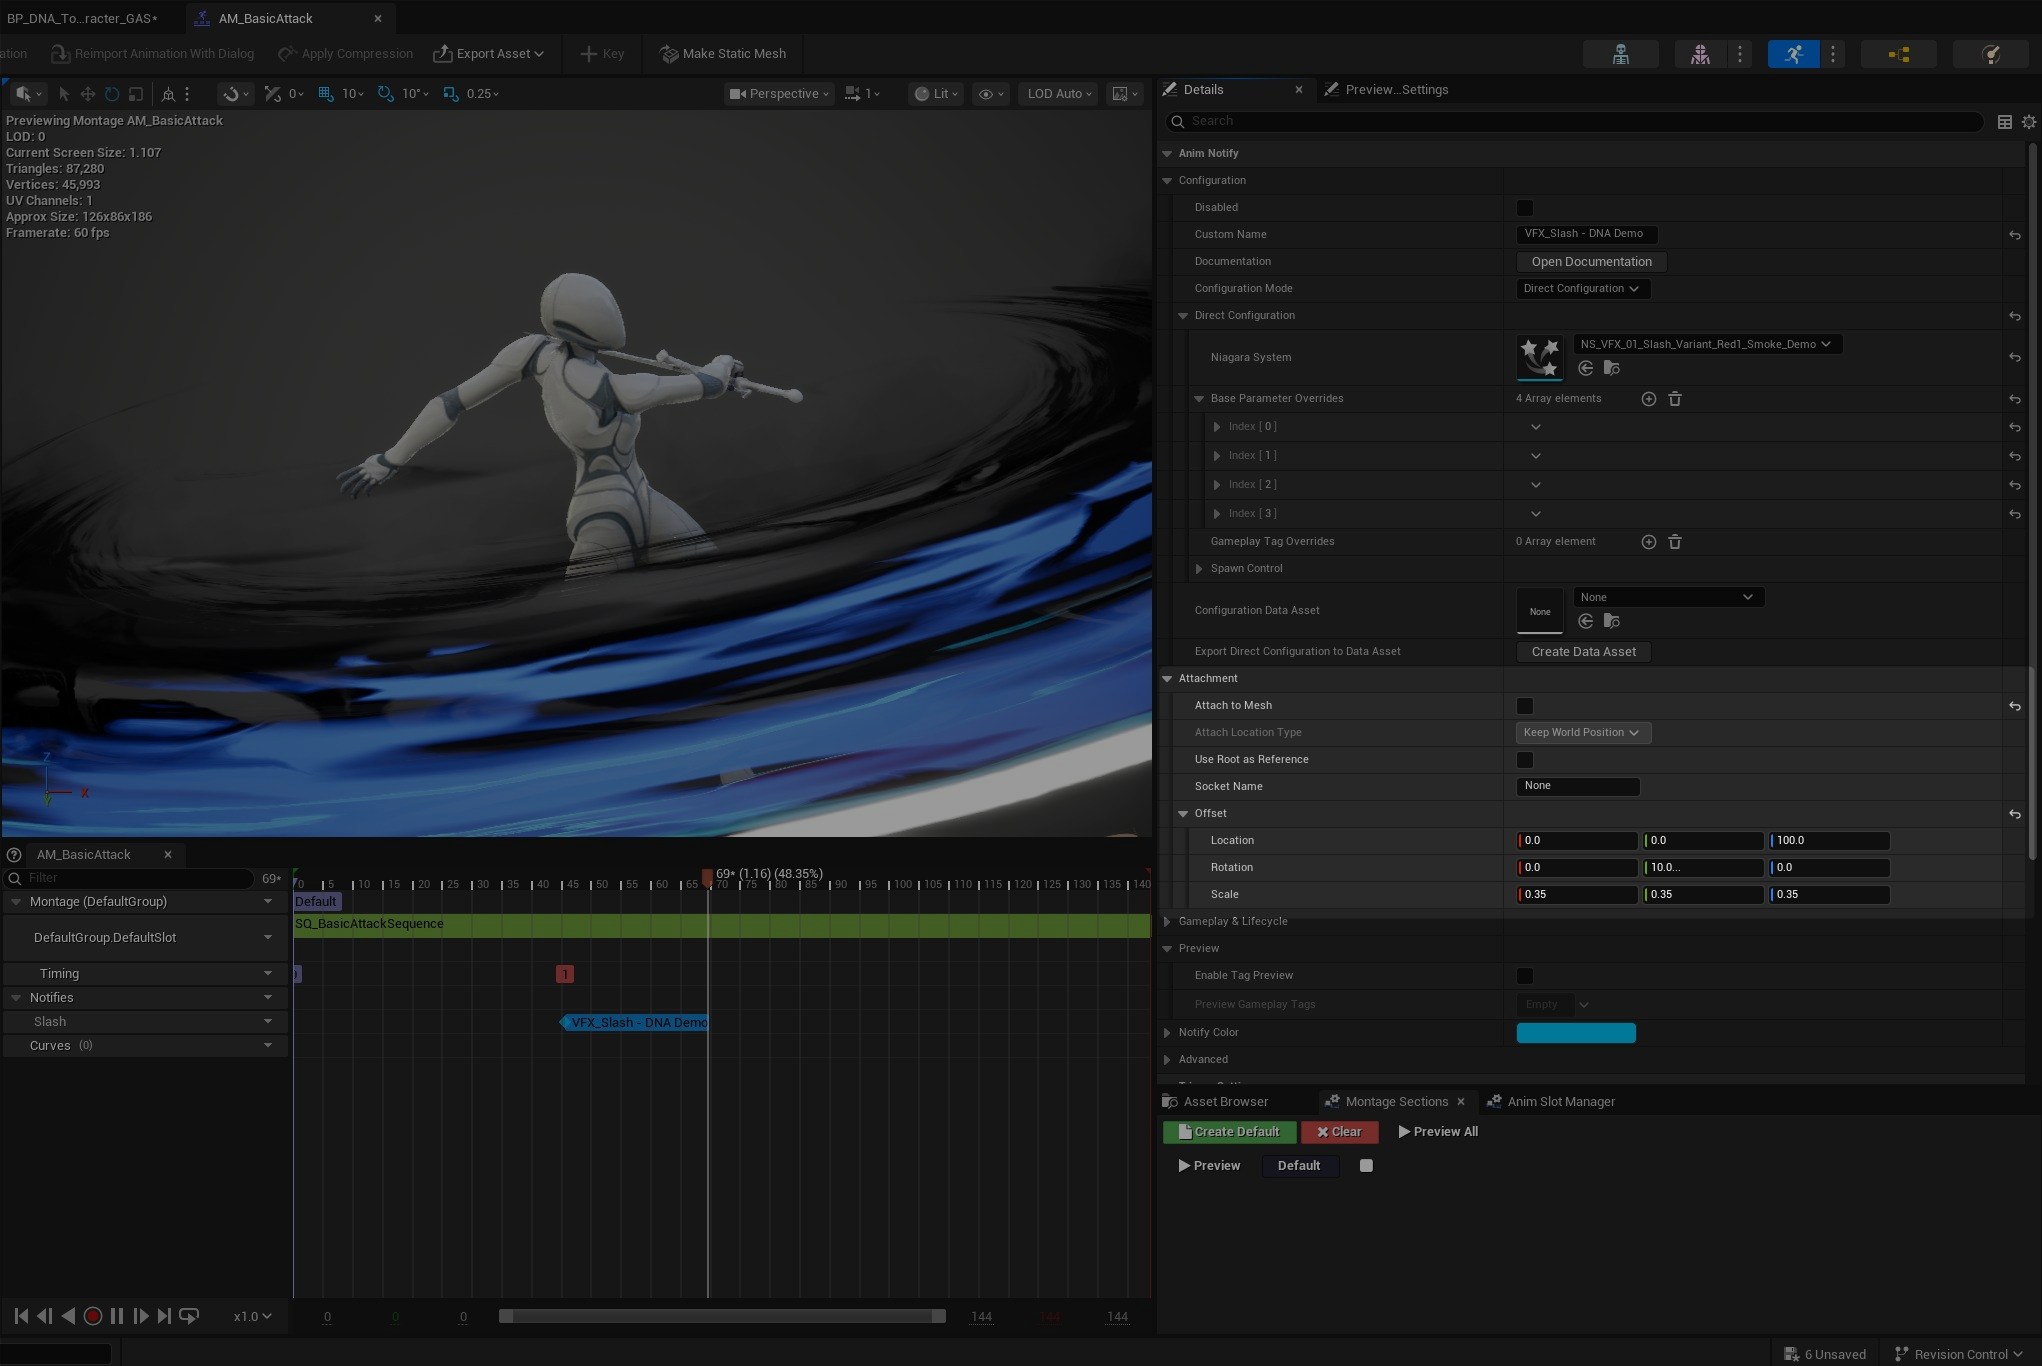
You can configure all of this in the "Attachment" section:
- Attach to mesh: true/false
- Attach Location Type: Keep World Position, etc.
- Use root as reference: true/false
- Socket name: In case you want to attach the effect to a specific socket of the skeleton
- Offset: Add transform offset relative to the socket/mesh
6. Add Parameter Overrides
Once your effect is correctly positioned, go back to Direct Configuration, and click the + icon in "Base Parameter Overrides".
This will allow us to modify the value of a user parameter and see the result directly in the animation preview.
In the "Parameter name" dropdown, you can find the list of all compatible user parameters. Choose one, for example User.Sprite Scale.
This will automatically set the Parameter type to the correct value. Do not change it unless you changed the parameter type in your Niagara System.
Leave the "Priority" field at zero since it's only used for more complex setups (Hybrid Data Asset + Direct Configuration and/or Gameplay Tag Overrides).
Then, in the "Float Value" field, you can set the value of this parameter.
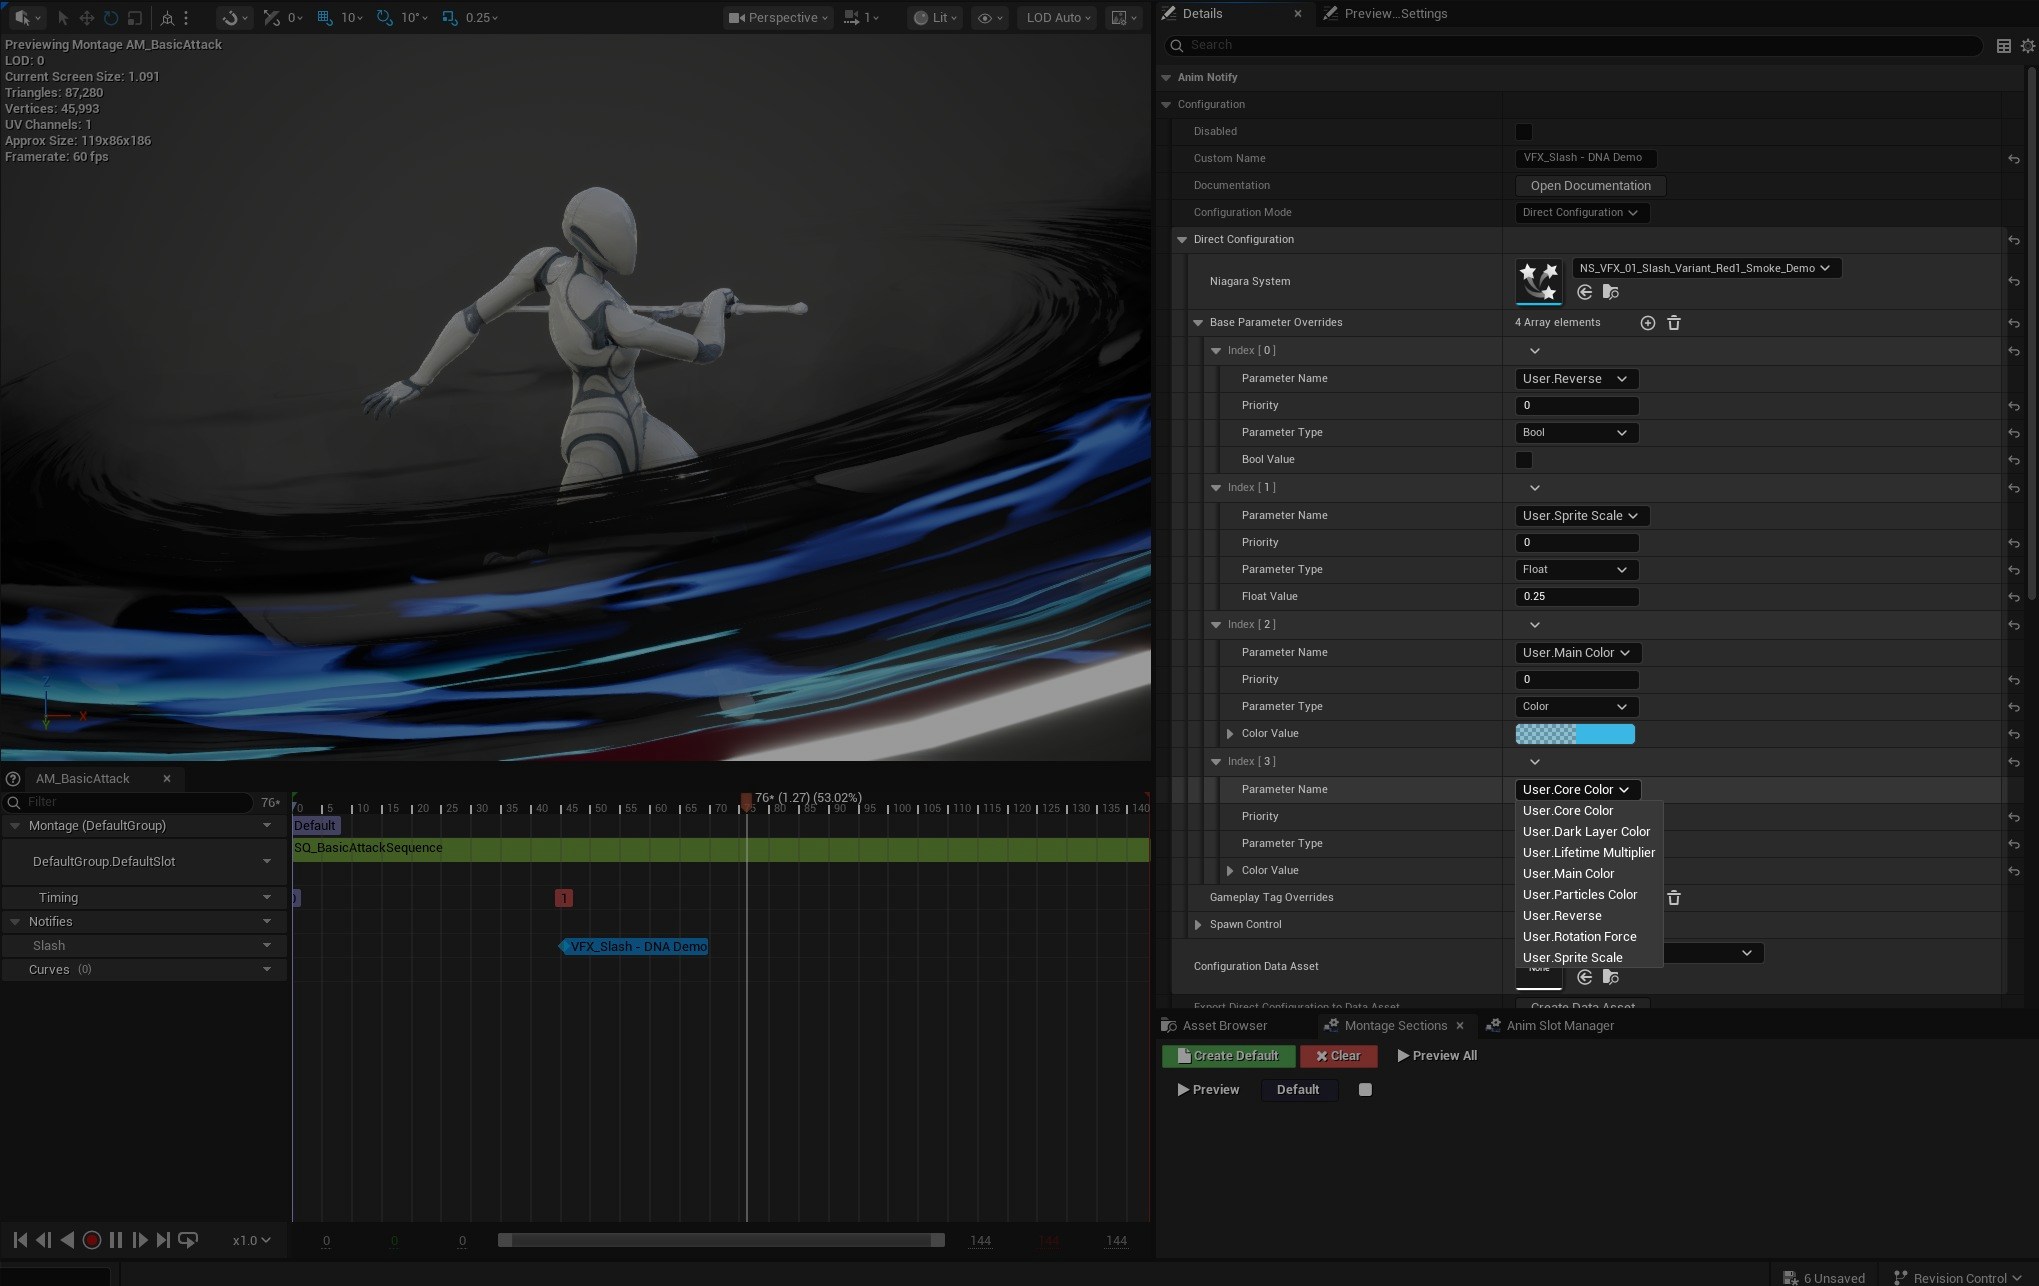
7. Add Multiple Overrides
You can add many overrides! In this example, I will also override the colors and the reverse boolean.
All parameters of the following types can be adjusted in the override:
floatvector 3Linear Colorbooleanint
Note: If you'd like to have other parameter types supported, please ask us here.